Microsoft has released LAPS (Local Administrator Password Solution) to easily allow different complex passwords for the local Administrator account on every client. It also allows to manage another user than the Built-in Administrator with the Well-Known SID (-500). But it does not create such a user.
In this article, I show you how to configure a SCCM Configuration Item to create such a user with a dynamic password.
Update: I removed an issue in the remediation script which did not always delete the password expiration time in a multi domain environment.
I won’t go into the details of configuring LAPS in your environment, there are already some really good articles about that topic.
The validation script
The validation script checks the following:
- is LAPS enabled?
- is LAPS installed?
- is an Admin Account Name specified in the GPO?
- Does the Admin Account exist?
The remediation script
The remediation script creates a local user with the name specified in the Group Policy and sets a random complex password. After that it deletes the expiration time attribute (ms-Mcs-AdmPwdExpirationTime) from the Active Directory computer object so that LAPS will set a new password on the next policy update. Finally, it triggers a policy update.
It does not add the user to the Administrator group. I recommend to do this with Group Policy.
Group Policy setting
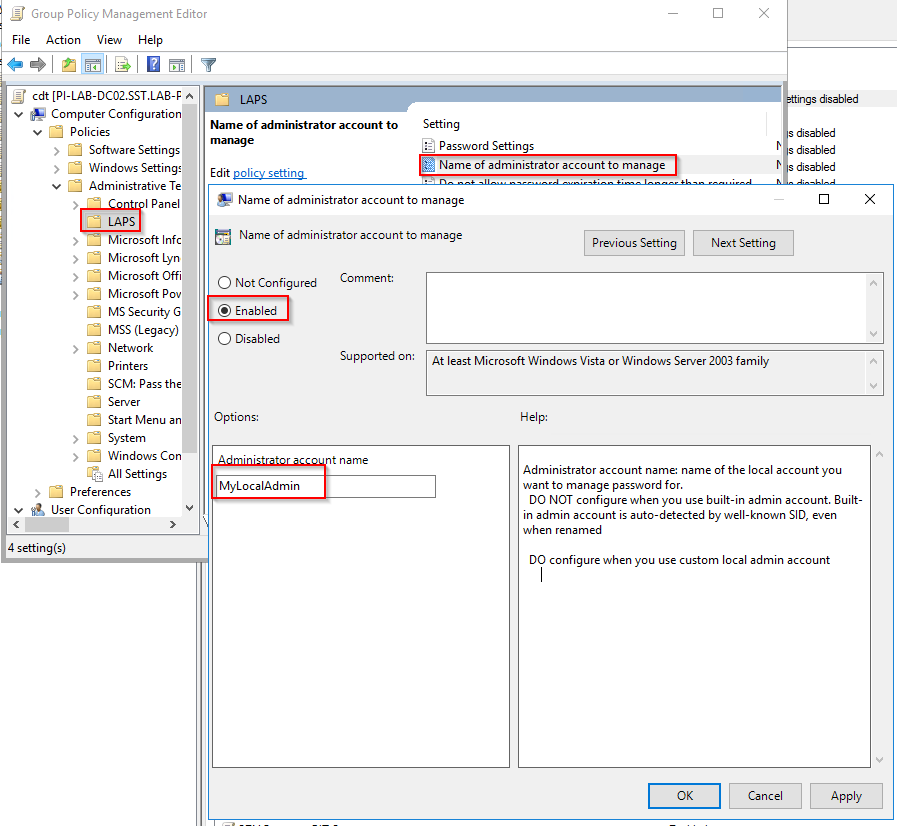
If you want to manage another local user than the Built-in Administrator you have to configure the following policy setting in your Group Policies:
Computer Configuration\Policies\Administrative Templates\LAPS\Name of the administrator account to manage
Set it to enabled and enter the name of the local account you want to create.
Configuration Manager
Create Configuration Item
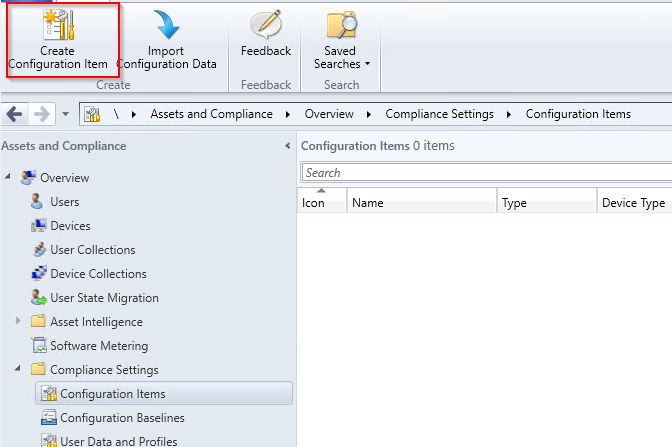
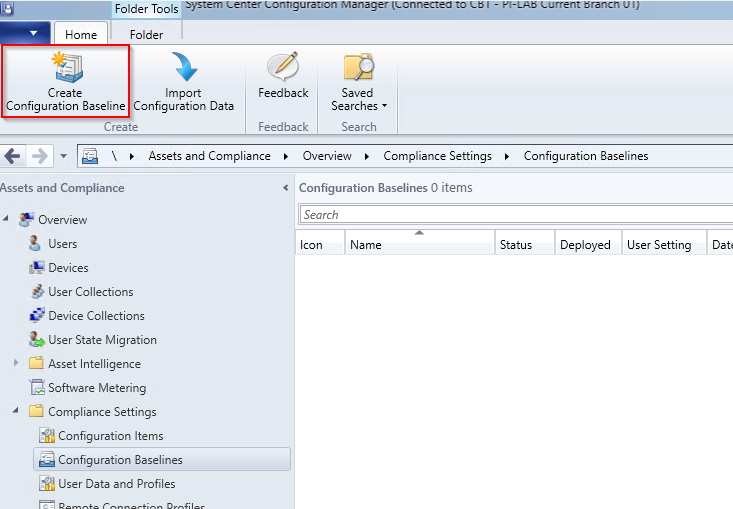
In the SCCM console go to Assets and Compliance - Compliance Settings - Configuration Items and click on the Create Configuration Item .
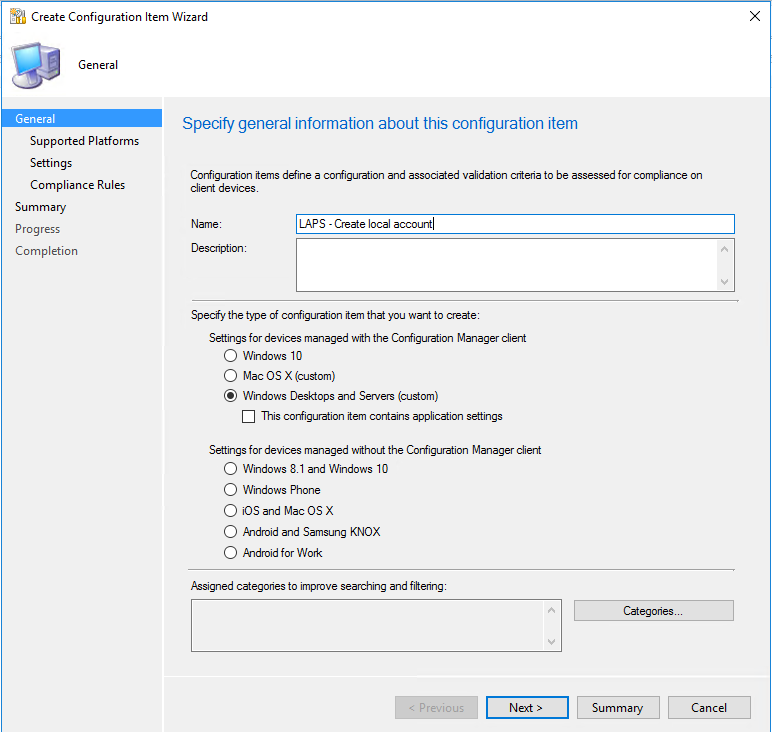
Specify a name and select Windows Desktops and Servers (custom) as type.
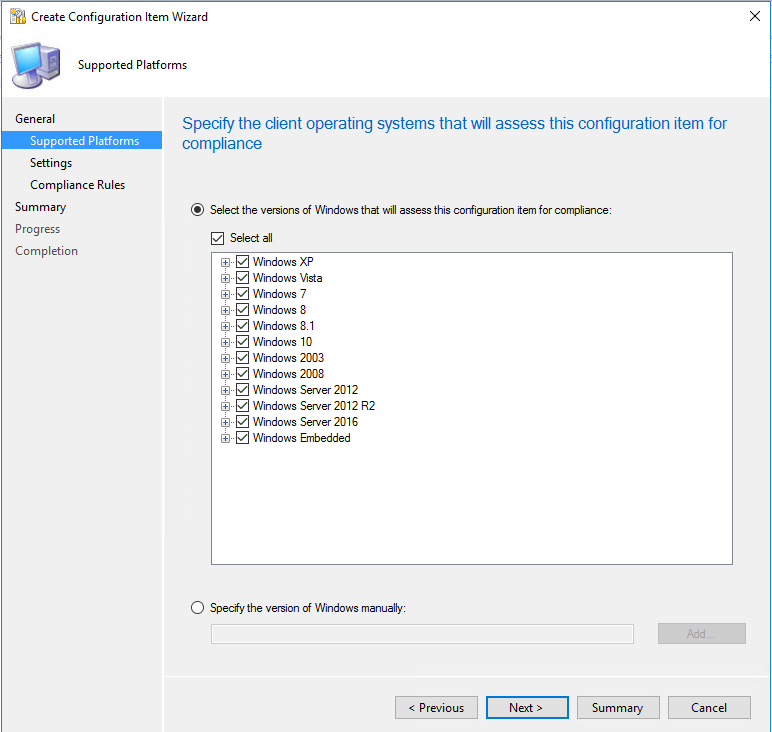
Select the Operating system versions you want to support (requires PowerShell).
Click on the New… button.
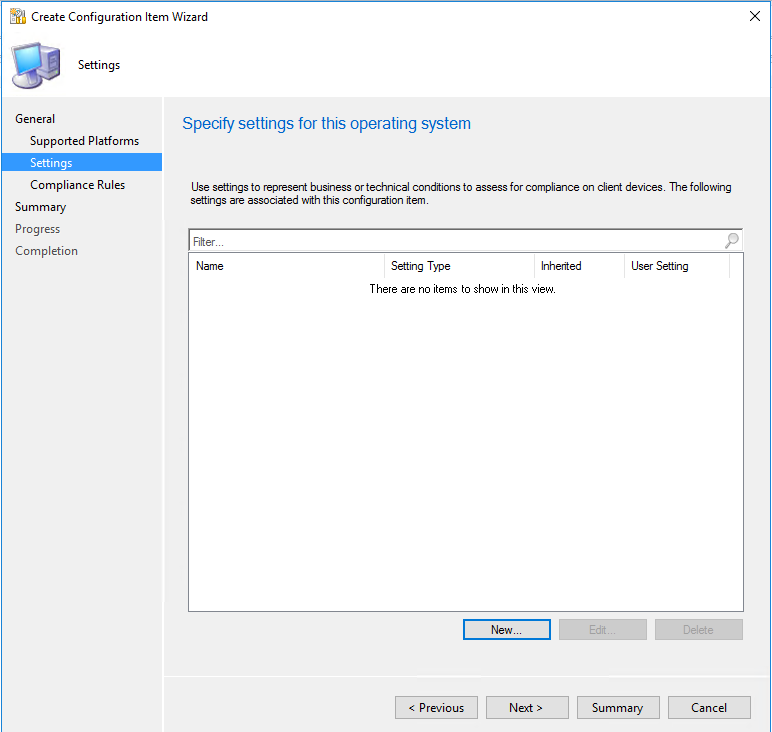
Specify a name for the setting and select as Setting type Script and as Data type String.
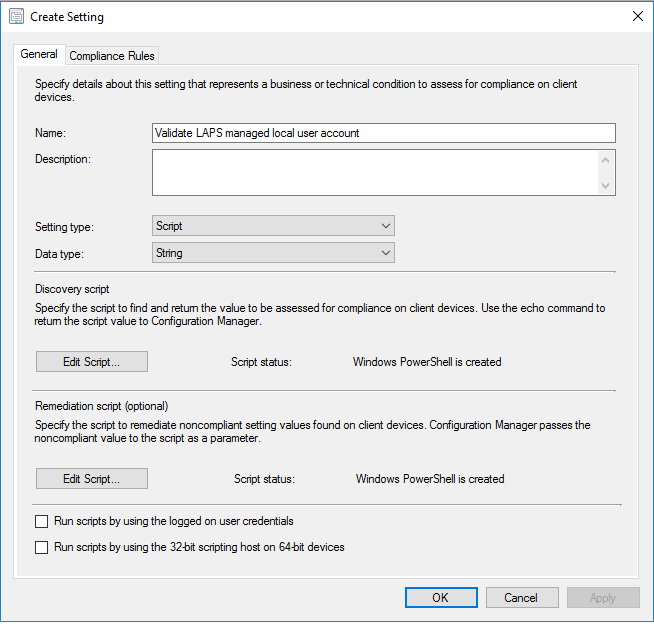
Click on the upper Edit Script… button in the Discovery script area. Then select PowerShell, and copy paste the following script to the script area.
Do the same with the lower Edit Script… button in the Remediation Script area with the following script.
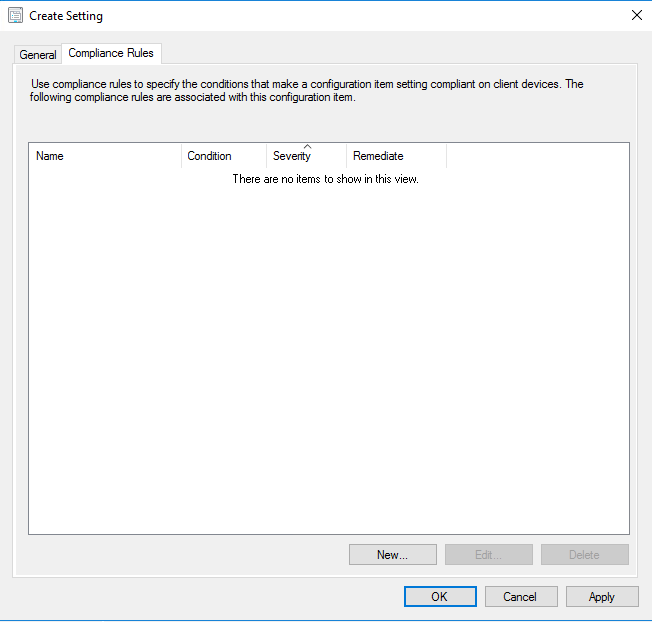
Change to the Compliance Rules Tab and click on the New… button.
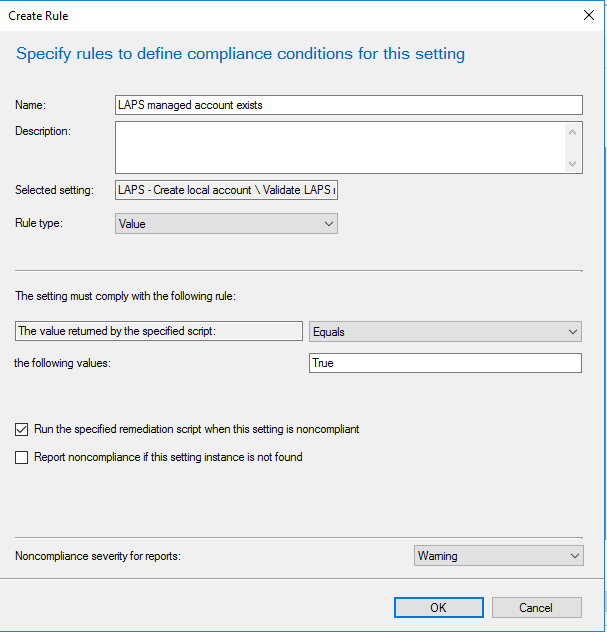
Define a Name for the rule select Rule type Value. The value returned by the specified script should be Equals the following values True.
Make sure you select the Run the specified remediation script when this setting is noncompliant checkbox.
You can choose the severity of this rule. For me Warning is high enough.
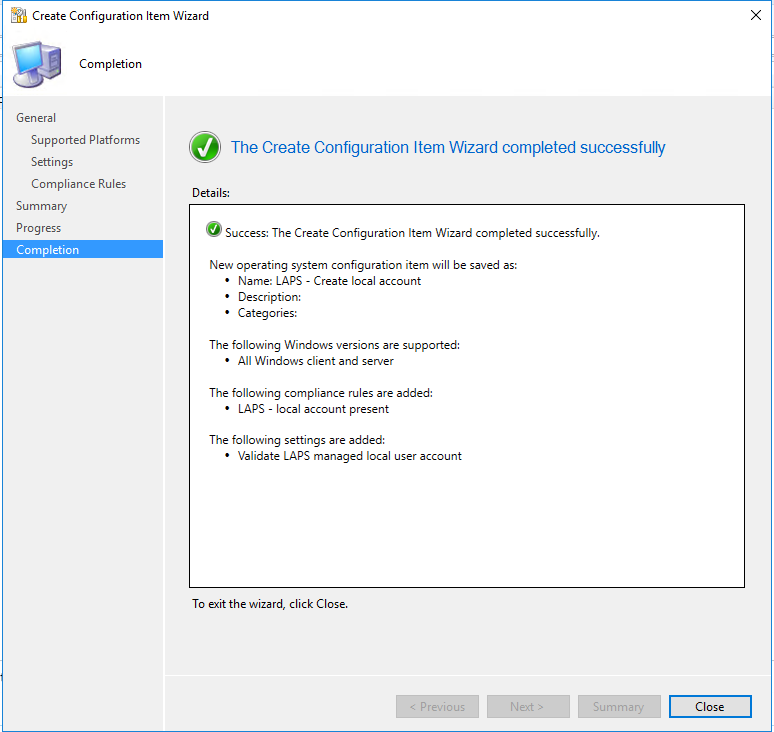
After that you can complete the creation of the Configuration Item.
Create Configuration Baseline
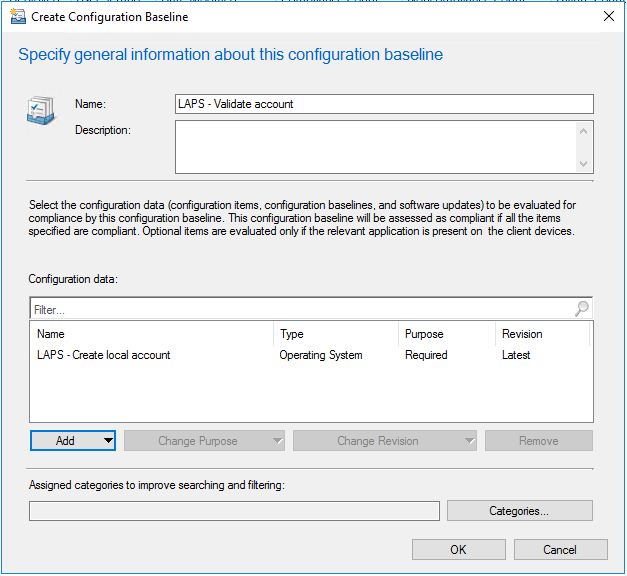
Now you have to create a Configuration Baseline in Assets and Compliance - Compliance Settings - Configuration Baselines .
Choose a Name for the baseline and Add the configuration item you have created earlier.
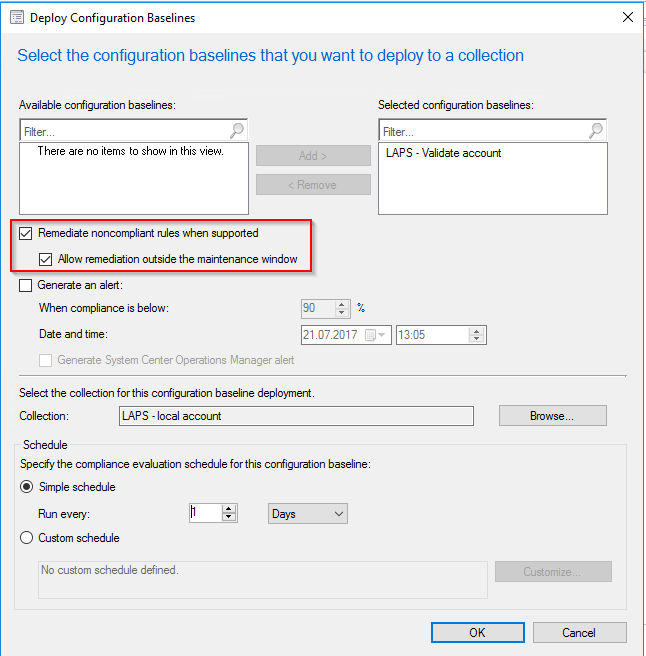
Deploy Configuration Baseline
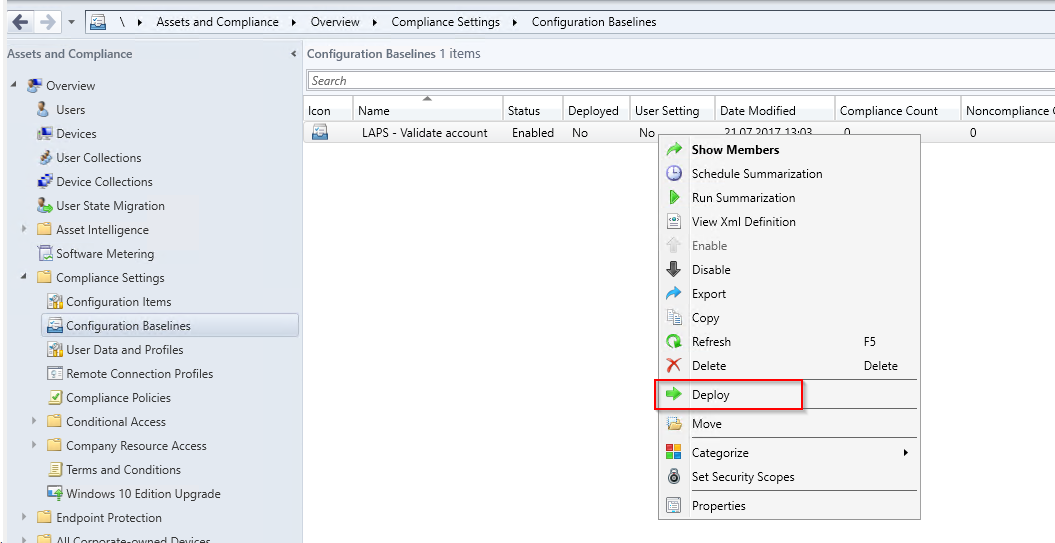
After that you can Deploy the Configuration Baseline to a collection.
Please make sure to select the Remediate noncompliant rules when supported and the Allow remediation outside maintenance window check boxes.
Besides,you have to select how often this rule will be checked. I selected once per day.
Test the Configuration Baseline
After successfully deploying the baseline you should check the Configurations Tab in the Configuration Manager Properties Control Panel on one of your clients.
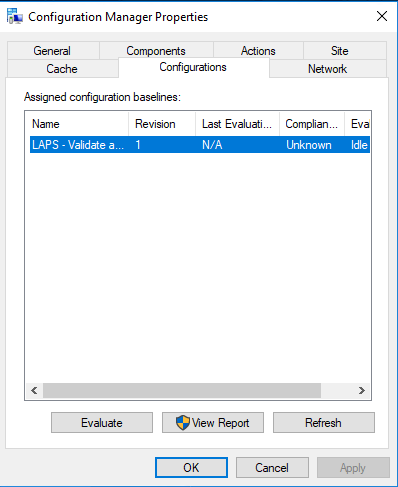
If the rule was not already evaluated press the Evaluate button.
After successfully evaluating the rule it will be shown as Compliant and the user was created.
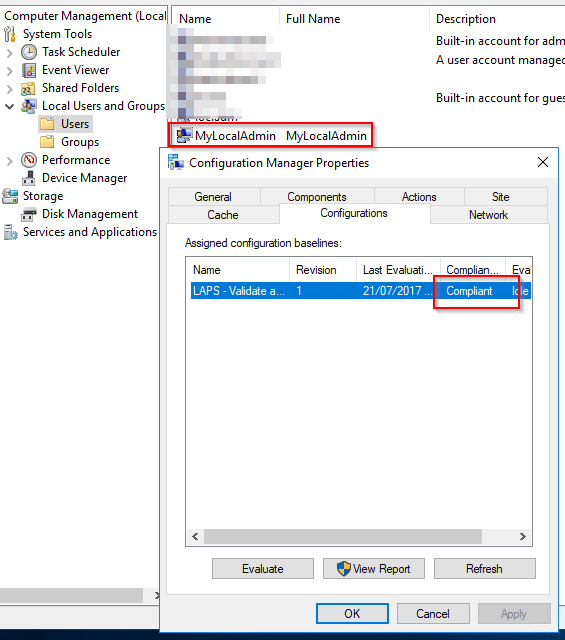
The LAPS agent now has a target user and will soon change the password of the user and save this new password to the Active Directory object of the computer.
Hints
- Check the DcmWmiProvider.log if you get any errors executing the baseline. There you can see the real PowerShell error.
- If you see a message there like the one in the screenshot below you have to configure PowerShell execution policy to Bypass in the Computer Agent section in the Client settings or you have to sign the scripts with a Code-Signing-Certificate.

